"Tranquility" Trinket Box/ Altered Pringles Can
Hello Crafty Friends! Jeanne back this week with my last project of this month and a tutorial on how I created this Trinket Box using a Pringles can. I first made this project 8 years ago when I started crafting and I really enjoyed making something beautiful from something recyclable. I used this month's Scrapbook Kit to create this project.
![](https://cdn.shopify.com/s/files/1/0505/0151/7498/products/Scrapbookkit_fa59641e-dabc-4bf1-bf3b-540b89bb9fb8_240x240.jpg?v=1677643882)
![](https://cdn.shopify.com/s/files/1/0505/0151/7498/files/Polish_20230323_145444126_480x480.jpg?v=1679622908)
![](https://cdn.shopify.com/s/files/1/0505/0151/7498/files/Polish_20230323_145723856_240x240.jpg?v=1679623049)
![](https://cdn.shopify.com/s/files/1/0505/0151/7498/files/Polish_20230323_145855808_240x240.jpg?v=1679623133)
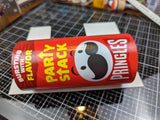
I began by washing the Pringles can with just a little bit of dish soap and a little water, not soaking it in water, then rinse and dry quickly. Next I measured the can at 6 inches all around and marking it using a marker. Next I used an Xacto knife to cut around it where I made the marks. When finished I cleaned up the edges using scissors.
I then took some heavy weight card stock and traced the can then cutting them out. Next I adhered those circles onto the pattern paper that I would be using as the sides of my box. *I ended up using a different pattern paper in the end result
![](https://cdn.shopify.com/s/files/1/0505/0151/7498/files/PXL_20230309_230938721_160x160.jpg?v=1679615512)
![](https://cdn.shopify.com/s/files/1/0505/0151/7498/files/PXL_20230309_231525953_160x160.jpg?v=1679615585)
![](https://cdn.shopify.com/s/files/1/0505/0151/7498/files/PXL_20230309_233103017_160x160.jpg?v=1679615753)
![](https://cdn.shopify.com/s/files/1/0505/0151/7498/files/PXL_20230309_233108448_160x160.jpg?v=1679615787)
![](https://cdn.shopify.com/s/files/1/0505/0151/7498/files/PXL_20230309_233320371_160x160.jpg?v=1679615820)
![](https://cdn.shopify.com/s/files/1/0505/0151/7498/files/PXL_20230310_020751963.PORTRAIT_160x160.jpg?v=1679616732)
![](https://cdn.shopify.com/s/files/1/0505/0151/7498/files/PXL_20230310_021822388.PORTRAIT_160x160.jpg?v=1679616783)
![](https://cdn.shopify.com/s/files/1/0505/0151/7498/files/Polish_20230323_150032810_480x480.jpg?v=1679623151)
![](https://cdn.shopify.com/s/files/1/0505/0151/7498/files/Polish_20230323_145556836_240x240.jpg?v=1679622975)
![](https://cdn.shopify.com/s/files/1/0505/0151/7498/files/Polish_20230323_150311850_240x240.jpg?v=1679623182)
Now I had to cut the opening so for this I traced a line using a ruler then cutting it using my Xacto knife. Once I did that I took my ruler again and and my score tool and made a score line as seen on the 3rd photo below. I then took some Liquitex white gesso and a sponge brush and covered the inside of the can, once that dried I then went over it using Folk Art "Ballet Pink" Matte Acrylic Paint.
![](https://cdn.shopify.com/s/files/1/0505/0151/7498/files/PXL_20230309_234035207_160x160.jpg?v=1679615940)
![](https://cdn.shopify.com/s/files/1/0505/0151/7498/files/PXL_20230309_234432366_160x160.jpg?v=1679616081)
![](https://cdn.shopify.com/s/files/1/0505/0151/7498/files/PXL_20230309_235210280_160x160.jpg?v=1679616214)
![](https://cdn.shopify.com/s/files/1/0505/0151/7498/files/PXL_20230309_234652492_160x160.jpg?v=1679616314)
![](https://cdn.shopify.com/s/files/1/0505/0151/7498/files/PXL_20230310_002830246.PORTRAIT_160x160.jpg?v=1679616373)
![](https://cdn.shopify.com/s/files/1/0505/0151/7498/files/PXL_20230310_004730784_160x160.jpg?v=1679616445)
![](https://cdn.shopify.com/s/files/1/0505/0151/7498/files/PXL_20230310_004738122_160x160.jpg?v=1679616547)
![](https://cdn.shopify.com/s/files/1/0505/0151/7498/files/PXL_20230310_014643359.PORTRAIT_160x160.jpg?v=1679616591)
![](https://cdn.shopify.com/s/files/1/0505/0151/7498/files/Polish_20230323_173835120_480x480.jpg?v=1679623205)
![](https://cdn.shopify.com/s/files/1/0505/0151/7498/files/Polish_20230323_174135015_480x480.jpg?v=1679623255)
I now chose a sheet from the "Tranquility" collection from the Scrapbook Kit and cut it at 6 x 7 and I then rolled it and held it using some clips just to get the paper use to the circular shape. I left it like this for a night. Next I adhered it using Aleene's Tacky Glue and then making sure I measured it correctly.
Once it dried, I began adding the closure hardware, next I measured and penciled in where I would be placing the beads I would be using as the feet for this box. I then adhered them using hot glue.
Next I began adding my laces and embellishments. On the lid I used laces from Lavish Laces I received as a gift. On the the bottom part where the lid locks, I used a piece of the laser elements. I also used some of the flowers and other designs from the elements package. I also used flowers from 49 and Market and Prima marketing. On the back part of the box, I used a larger applique' piece from my stash. Then I added some splatters of Lindys Stamp gang Glitz Magicals "Gleaming Gold", which is one of my favorite new product colors! This is included in this month's Mixed Media Kit.
Lastly I added a piece of hand dyed fabric using Beacons Fabri Tac to the inside then adhering a braided trim as well.
![](https://cdn.shopify.com/s/files/1/0505/0151/7498/files/PXL_20230310_015652252_160x160.jpg?v=1679616629)
![](https://cdn.shopify.com/s/files/1/0505/0151/7498/files/PXL_20230310_020742429.PORTRAIT_160x160.jpg?v=1679616703)
![](https://cdn.shopify.com/s/files/1/0505/0151/7498/files/PXL_20230322_000757647.PORTRAIT_160x160.jpg?v=1679616865)
![](https://cdn.shopify.com/s/files/1/0505/0151/7498/files/PXL_20230322_000813094.PORTRAIT_160x160.jpg?v=1679616901)
![](https://cdn.shopify.com/s/files/1/0505/0151/7498/files/PXL_20230322_010020557.PORTRAIT_160x160.jpg?v=1679622707)
![](https://cdn.shopify.com/s/files/1/0505/0151/7498/files/PXL_20230322_215733345.PORTRAIT_160x160.jpg?v=1679622767)
![](https://cdn.shopify.com/s/files/1/0505/0151/7498/files/PXL_20230322_215746066.PORTRAIT_160x160.jpg?v=1679622805)
![](https://cdn.shopify.com/s/files/1/0505/0151/7498/files/PXL_20230322_223624575.PORTRAIT_160x160.jpg?v=1679622830)
![](https://cdn.shopify.com/s/files/1/0505/0151/7498/files/PXL_20230323_022520442_160x160.jpg?v=1679622871)
I hope that my step by step instructions are easy to follow, if you have any questions you can message me on my social media. I really enjoyed creating this for you this month and I hope you will give it a try. These were a popular project to create back then so I thought I would bring this back.
Well my friends, I will be back now in April with some Spring filled projects this time around!! I hope you will come back for our sneak peeks and the reveal! Sending love and hugs to you all!!
XOXO,
![](https://cdn.shopify.com/s/files/1/0505/0151/7498/files/Signature_for_Blog_240x240_480x480_480x480_480x480_1_d2a9c491-e48a-4fcd-aa58-e4d08513ecce_480x480.webp?v=1678476197)
P.S. Check out the newest Mood Board/Sketch Challenge happening this month!!
Here is the details for that.
This month's twist is "SPRING FLOWERS"
![](https://cdn.shopify.com/s/files/1/0505/0151/7498/files/55954163b_2ac5d158-31d5-49fb-bf9f-c6e96318e6b0_480x480.png?v=1679012087)
Here are the rules:
*You can create any type of project for the challenge.
*You MUST say what you were inspired by.
*You MUST include the twist in your design.
*We would love to see you USE AT LEAST 1 of Tres Jolie’s products on your projects but it isn’t required to play along.
*It MUST be a new project
Place your entries in the February 2023 challenge folder on Tres Jolie Kit Club Cafe Facebook page. This challenge ends on March 31st 2023 at 11:59 pm CST. All entries must be in this folder to be eligible for the prize (to have everyone eligible to win, we are limited the same winner to once every 3 months).