Hello Craft Friends!
So happy you are here! Thank you for visiting our Tres Jolie blog!
Today I will share Three different greeting card styles, including a Gate fold, Easel and regular techniques, along with 2 matching chipboard Tags!
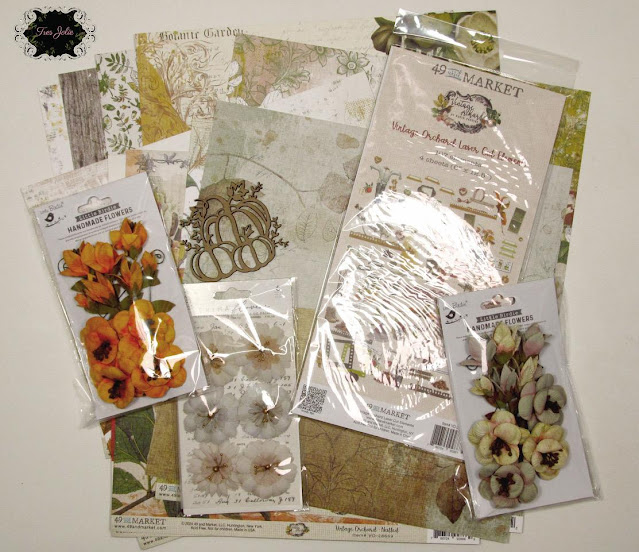
For this project, I'll be using Tres Jolie September Cards Tags and More kit! This month's kit has these elegant designed patterned papers from KanBan "Ornate Opulence " along with matching Card Toppers in two different sizes, white heavy Cardstock 8x11 for creating your card bases, Lace trim, Prima Marketing Flowers, Frantic Stamper Cutting die- Fleur de lys Scroll, and Studio Light's Wooden set of embellishments! Here's a look at the kit:

From my stash I'm using Foam dots, ribbon and tulle, wooden butterfly embellishment, crown charm, Dazzle stickers, sentiments and Stickles Stardust glitter.
To create our first card (Gatefold) Take one piece of the white cardstock in your kit. Cut to measure 11x 5 & 1/2 . Score at 2 & 3/4 & 8 & 1/4 fold and crease. See photos:

Chose one patterned paper and small card topper from your kit.

Cut your patterned paper to measure 2 & 1/2 x 5 & 1/2 inches. Glue your papers one on each Gatefold flap. See photo:

Glue your small card topper onto the left side flap only. See photo:

Set aside your card for now. Remove your diecut from the package. From a scrap piece from the same patterned paper, diecut one Scroll. See photo:

Open your card and glue your diecut piece inside at the top. From my stash, I added a Dazzle sticker sentiment below. You could use a stamp from your stash, or write a message inside. Here's a photo:

On the front of my card, I glued a Wooden embellishment at the bottom right flap. See photo:

On the left upper corner on the front of my card, I applied another Dazzle sticker piece. Here's some photos:


Card 2: Take another piece of white cardstock and cut down to measure 8 x 5 & 1/2 inches. Place your card horizontally on your workspace. Chose a patterned paper and cut to the same size. Glue your paper on the frontside of your card. See photos:


Take one of the small card Toppers, add foam dots on the backside And adhere on the upper right corner. On my card topper, I glued one of the larger Prima flowers from your kit and a fussycut butterfly from another circle punchout from this kit. I applied some Stickles Stardust glitter on the butterfly wings! Here's acouple photos of my finished card!


Easel card 3: Cut another piece of white cardstock to measure 11 x 6 inches. Score at 3 & 6 inches. Cut an additional white card to measure 6x6 inches. See photos:


Fold and crease your card base. This is how your card base will look.

Next chose acouple coordinating papers from your kit along with 2 matcthing journal cards and small card topper. We will use these to cover our card base. Cut one 6x6 and glue to your 6x6 card. Cut the other paper, to 5 & 3/4 and glue to the backside. Cut another piece of the same paper to measure 5 & 3/4 x 5 & 3/4, leaving a white edge visible around the edge. Here's a photo of what I chose to use:

Glue your papers in place. One on the backside of your easel bse. See photo:

Glue your other papers on the bottom easel base and 6x6 card base. Here's a photo:
Set your card aside and remove one of the Wooden embellishment pieces from your package. I cut into two pieces. Then taking some Gold Gliding Wax I applied to both pieces. See photo:

Take your card and glue your 6x6 card onto the front upper flap. Take one of the journal cards and tear along the edge into 2 pieces, see photo:

apply Distress Ink Gathered Twigs on the edges and glue both pieces on the right lower side. Take the matching journal card and fussycut out the floral images. See photo:

With foam dots, adhere over the matching image on the other journal card. I applied some Stickles Diamond glitter on the flower petals.
Bottom of easel, take your smaller card topper, apply acouple layers of foam tape on the backside, to create a stopper and hold your upper card base in place. Glue the other Wooden embellishment on the leftside of your small card topper. On the right side I glued one of the border pieces in the kit on the right side. Trim off any excess border. Here's some photos:


To finish my card, I cut out a sentiment from my stash and glued on the front upper corner! Here's some photos of my finished card:


Now we can create 2 matching chipboard Tags! The Chipboard Tags are from Tres Jolie. You can find them here: https://tresjoliekits.com/collections/chipboard/products/miscellaneous
Tag 1: Cover your tag with one of the patterned papers in the kit. Also take the blue gold swirl birder strip and small journal card.

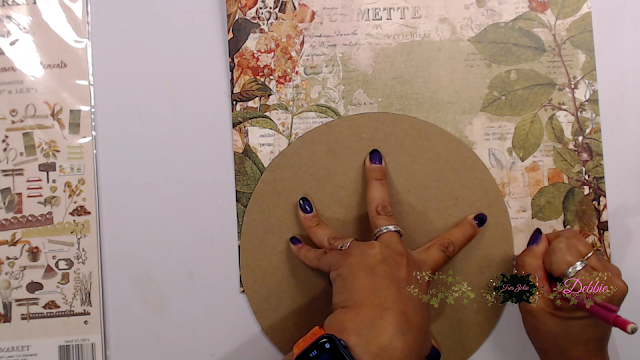
Cut your patterned paper to measure 3 & 3/4 x 8 & 3/4 inches. With an x-acto knife trim away the excess paper from all 4 corners on your tag. See photos:

Glue your border strip along the bottom edge and cut a piece of lace and glue on both the top and bottom edges. See photo:

Take your small journal card and apply foam tape onto the backside and adhere onto your tag towards the top at a slight angle.
I thread some blue ribbon I had in my stash along with a silver crown charm. Tie into a knot. To finish I added a few Dazzle stickers circles and touches of Stickles Stardust glitter. Here's some finished photos:


Tag 2: on the top portion of my tag, I applied some Versamark Clear ink (my stash) and sprinkled some Blue glitter embossing powder(my stash)over the top. Then heat emboss. See photo:

I chose the patterned paper with the colorful florals and Swirls. I cut into 5/8 inch strips. (Approximately i cut a total of 15 strips) Start weaving each strip over and under. Repeat with all strips of paper. See photo:

Once you have your strips centered and covering your chipboard tag, you can begin to glue them down. See photo:

Once you have glued all your paper strips in place, cut and trim off any excess paper. Here's how my tag looks:

On the bottom edge I glued a piece of lace from the kit. Take a large matching Card topper, apply foam dots on the backside and adhere in the center. Take acouple of blue Prima marketing flowers and glue onto your card topper. I did add a some small purple flowers and another Prima flower from my stash. I fussycut out a bird from one of the card Toppers. Then tucked him behind my larger blue Prima flower. I glued acouple blue gems from my stash, on my card topper. Here's a photo of my card topper!

To finish I tied some light blue tulle from my stash into a knot and added a wood butterfly embellishment over top! Here's a finished photo:

Now we are all done! I'm sure any special friend or family member would love to receive one of your handmade cards and or Tags!
I thank you for joining me today! I hope I've inspired you with some cardmaking ideas and tag designs. Please share your craft creations with us on the Tres Jolie kit club Cafe page!
I'll be back next week to share another project idea! Until next time, Happy Crafting!
Dana
September 2024 Mood Board Challenge
Tres Jolie has always hosted a monthly sketch or mood board challenge. So, with that being said, here are the rules:
This challenge is still open to everyone.
2. You can create any type of project for the challenge.
3. You MUST say what you were inspired by.
4. You MUST include the twist in your design. This month's theme is BOHO CHIC
5. We would love to see you USE AT LEAST 1 OF Tres Jolie's products on your projects but it isn’t required to play along.
6. It MUST be a new project.
7.To have everyone eligible to win, we are limited the same winner to once every 3 months.
Here's our Monthly Mood Board:

TRES JOLIE LINKS
Tres Jolie Facebook
Tres Jolie Instagram
Tres Jolie Pinterest
Tres Jolie YouTube
Tres Jolie Blog
Want to purchase a kit? Check out our Blog, & More? Click here
Or make it easier & join in the monthly subscription here
]]>


.png)


.png)
.png)


.png)
.png)


.png)


.png)


.png)


.png)


.png)
.png)


.png)