Serenity Cards with Fairies for Tres Jolie
Hi everyone,
Today I am sharing this beautiful Uniquely Creative paper Serenity that is featured in the June 2025 Card, Tag and More Kit. With this kit you get a ton of ephemera, so there are tons of possibilities to make some great projects. I also used the fun chipboard fairies from the shop. I have all the links down below for you as well the step by step tutorial and video tutorial for you.


To start I placed clear gesso on the chipboard fairies. Then I painted fawn acrylic paint on each fairies, and then painted the fairies.


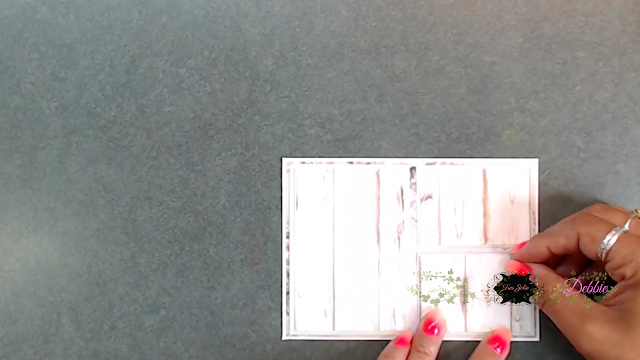
Card #1
Cut 1 pc pattern ppr at 4 x 5 5/8
Cut 2 pcs cardstock at 1 7/8 x 2 5/8
Cut 2 pcs pattern ppr 1 3/4 x 2 1/2
Cut 1 pc pattern ppr 2 1/2 x 3 5/8
Cut 1 pc cardstock 2 3/4 x 3 7/8


Card #2
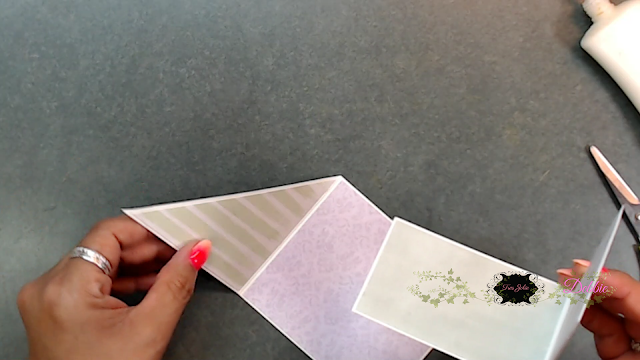
Now adhere the pattern pieces on top of the plain cardstock. Adhere the pattern paper 4 x 5 5/8 inches on top of the card
Now adhere the panels on top of the front of the card. ***for more details view the video tutorial***
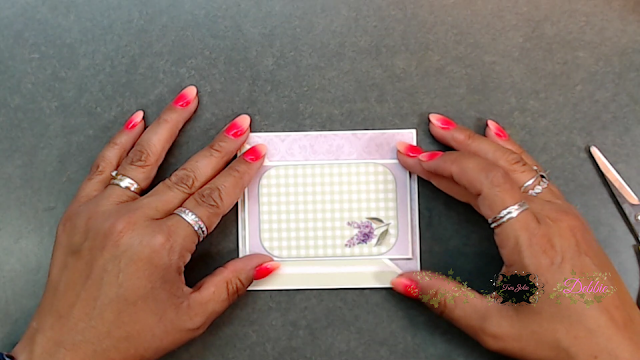
Here is the finished card front with the added ephemera and the painted chipboard fairy.
Here is the finished inside of the card.
Card #2
Take one card and cut 2 1/4 inches off from the A2 card, as shown below.

Put the 2 1/4 inch piece aside.
For the larger piece place a ruler diagonal draw a line and then cut the top piece off.

Cut off the top piece.

Next cover the front and inside of the card.
For the 2 1/4 inch piece cover the front and inside. Adhere this piece to the inside of the of the card.
The flap will fold over the diagonal flap. **View video tutorial for more details****
Card #3
Cut 3 2inch circles.

Place the 3 circles around the top of the card, as shown below.

You can use you punch for the end circles and then use your xacto knife to cut out the circle that is hard to reach.

Here is what your card should look like.

Next place a pattern paper behind the front of the card, trace the circles and cut out. Then adhere the pattern paper to the front of the card.

Next I cut a pattern paper, adhered it behind the circles. I then started getting the ephemera pieces and adhering them down. On the ephemera pieces, I doubled the images up placing one image down and the second image I used foam tape to raise up and adhered on top of the first image. This gives a nice down image look. ****view video tutorial for more details****

Here is what the inside of the card looks like. I added a nice sentiment and a beautiful little dragonfly.

I hope you were inspired by today's Serenity cards I created using the beautiful chipboard fairies. These were so fun to create. You can find everything here in the Card, Tags and More June 2025 Kit. This kit is full of wonderful items and definitely gives you a lot to get your creativity going, along with the beautifully laser cut Chipboard Fairies.
Please stop by our Facebook page to see what new items our design team has
created using our monthly kits.
You can always post your projects on Tres Jolie FB page - Tres Jolie Club Cafe.
Don't forget to post your project on our Facebook Group Page, link is down below.
We would love to see what you create.
For more details you can always view the video tutorial process, which is at the top of the page.
Thanks again for joining me, I have all the links listed for you throughout the post so just click on the words and you will be taken directly to the store.
Enjoy and Happy Crafting.

Don’t forget to follow us on all our social media:
Facebook: https://www.facebook.com/groups/121919621993809/
Instagram: https://www.instagram.com/tresjoliekits/
Tres Jolie website: https://tresjoliekits.com/
Tres Jolie subscriptions: https://tresjoliekits.com/services/