Envelope Flip Book
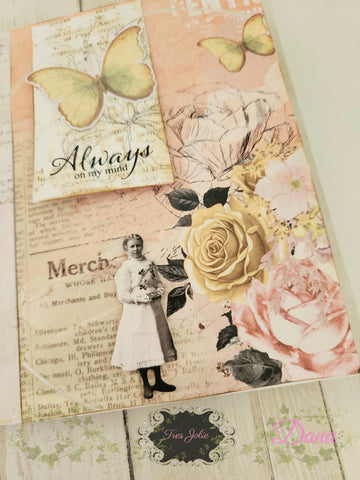
Hello Craft Friends! I'm Dana and I'm happy to be able to share another project I created using the August Tres Jolie Scrapbook kit! The papers in this month's Scrapbook kit are from 3 Quarter Designs "Blush Indulgence " which include extra element sheets and diecuts, flowers from Prima Marketing, Tres Jolie Chipboards!

Today I'll be creating a Envelope Flip book! I'm sure you all have extra envelopes lying around as I do. For this project we'll be using 4 envelopes total. Any size you have will work but you'll just need to adjust your measurements. The size envelopes I'm using measure 7 & 1/4 x 5 inches.

I cut off two of my envelope flaps and left the others in place. You can skip this step if you want. Place all your envelopes with the flaps on the right side. Taking a plain piece of paper from the kit i cut to measure 11" across x whatever the width of your envelope is. Example mine is 11x 7&1/4 inches. Lay your cardstock on your scoreboard with 11" across. Score at every 1/2" all the way to the end of your paper.
Now fold the first flap upward see photo:

Continue to fan fold to the end of your paper. It should look like this:

Fold and press your creases. Next chose 2 different patterned papers for the front and back covers. I cut to measure 11 x 7&1/4 inches. Now lay your fan fold piece of paper with the valley folds facing up. Skip the first two valleys and add adhesive to the third valley. I suggest using a strong adhesive so your book holds together well. Slip the first envelope into that slot with the adhesive and press together. Skip the next valley and place glue onto the next valley, add another envelope. Here's how it should look so far:

Continue this process until all 4 envelopes are glued in place. You will be left with two valleys on each side.

Glue your front patterned paper onto your first valley and do the same for the back cover.
Front cover:

Back Cover:

Next finish closing up your book. Place glue in between all the valleys on the back. I cut a piece of paper to cover and fit over my binding on the side. But you can skip this step if you want.

Now we are ready to start decorating our book.
Front cover: I cut out some sentiments and images from the elements sheets. In the center I glued the larger clock image and using foam dots, I adhered the smaller clock image over the top. The bottom flower from the diecut sheet I adhered with foam dots as well as the small flower at the top. The Beautiful sentiment I curled both ends before adhering. Here's a closeup!

Page 1: back of front cover: I cut my paper to measure 5x 7 & 1/4 inches and adhered to my page. I made a flip up page to measure 4x4 & 1/4 inches, scored 1/2 inch at the top and glued in place. I glued a diecut flower and sentiment at the bottom. You could add a photo underneath your flip page if you desire.
To decorate the envelopes, I made acouple templates from a scrap of cardstock.

Page 2: Envelope
Using my templates, I cut and covered my envelope front and flaps with patterned paper from this kit. I glued this pretty rose Tres Jolie Chipboard (this chipboard is exclusive for this kit) so you'll want to order a kit so you don't miss out) I glued a silver gem from my stash onto my envelope flap. Then tucked one of the 4x6 Journaling cards inside my envelope. This is a great place to tuck in some stickers or sequin packs to surprise your crafty recipient!

Page 3 and 4:
Page 3 I made a pocket page. I cut another patterned paper to measure 4 & 7/8 x 7 & 1/4 I scored at 7 &1/4 inches and folded up to make my pocket. I added a punched border at the top of my pocket. (The border punch I had in my stash) I tucked acouple small journal cards and diecut flower into my pocket. I glued a sentiment square at the top using foam dots and adhered at the top.
Page 4 envelope: I glued another coordinating paper onto my envelope and flaps. I fussy cut out a flower image and adhered with foam dots. Then tucked a small journal card into my envelope.

Page 5: I covered with paper and taking some smaller Journaling cards I made a waterfall page. I scored 1/2 inch at the top of each journal card before adhering. I glued a piece of eyelet lace from my stash. Over the top edge of my waterfall.
Page 6: I cut one of the border sentiments and glued to the bottom of my envelope. I added a wax heart seal (my stash)on my envelope flap and tucked another 4x6 Journaling card inside my envelope. Here's some photos!


Page 7: I took my Tres Jolie chipboard straight banner click here: https://tresjoliekits.com/products/borders
I covered this with a scrap paper from the kit and glued in place. I trimmed away any excess paper using my x-acto knife (my stash) and distressed any rough edges using a Distress tool (my stash) then I cut out some sentiment pieces from one of the small element cards. I glued the sentiment words onto my chipboard banner. Then using foam dots I adhered at the top of my page. I glued the Stay Strong journal card onto my page and using foam dots I adhered these mini paper dolls. (My stash)
Page 8: I covered my envelope with patterned paper and added a small journal card to the front and tucked a small journal card inside.


Page 9: I glued my paper in place, I cut out another small journal card and glued at the bottom right edge. Using foam dots I adhered a diecut flower. And some mini paper dolls from my stash.
Page 10: I made a small flip page using a leftover scrap paper from the kit, added another paper doll at the bottom. I glued a diecut butterfly on the top of my flip card. Here's acouple photos!

So there you have it. Our Envelope Flip book is finished! I will add some stickers, clips and sequin packs inside my envelopes for a sweet surprise. I think this would make a fun Happy Mail surprise to send a crafty friend! I hope you like my project today and will grab a kit and start creating! Please share on our Tres Jolie Facebook page! Thanks for taking time to stop by our blog. Be sure to check back soon and see more crafty inspiration from our Design Team!
Until next month, I wish you all a safe and Happy Labor day weekend! See you soon.
Dana
We have a new mood board challenge for the month. Here are the rules.
*You can create any type of project for the challenge.
*You MUST say what you were inspired by.
*You MUST include the twist in your design.
*We would love to see you USE AT LEAST 1 of Tres Jolie’s products on your projects but it isn’t required to play along.
It MUST be a new project.
Here is the mood board:

The theme for this month is: SOFT GRUNGE
Place your entries in the August 2023 challenge folder on Tres Jolie Kit Club Cafe Facebook page. This challenge ends on August 30th 2023 at 11:59 pm CST. All entries must be in this folder to be eligible for the prize (to have everyone eligible to win, we are limited the same winner to once every 3 months)
TRES JOLIE LINKS
Tres Jolie Facebook
Tres Jolie Instagram
Tres Jolie Pinterest
Tres Jolie YouTube
Tres Jolie Blog
Want to purchase a kit? Check out our Blog, & More? Click here
Or make it easier & join in the monthly subscription here
.