Christmas Envelope Photo Booklet
Good Morning all,
Christmas is getting closer and what a great time to create some memories, right? So today I have a cute way for you to create a little Christmas Envelope Photo Booklet to place those wonderful memories inside. I used the Card, Tag and More Kit for this month.
Here is the video with full details -
Let's get started. Here is a photo of the December Card, Tag and More Kit but we didn't use everything. We will be using a 5x7 inch envelope


First we start with creating the envelop flap.
Take the envelop and place on your cardstock, I used white. Place the envelop on top and measure below the envelope flap score line 1 inch.

Once you have it measured trace around the flap.

Cut out the flap and now score at 1/2, 5/8, 3/4 inches.

Next on your pattern paper trace your flap we created and cut out and adhere on top of the flap.


Adhere the envelop flap back onto the envelop, before we adhere the flap we created.

Next adhere the created flap onto the envelope. Place your adhesive to the 1/2 inch area and adhere that on the back of the envelope. This will be your closure.

For the photo mats cut 1 cardstock at 7 x 5 inches and score along the 5 inch side
downward 1/2 inches.
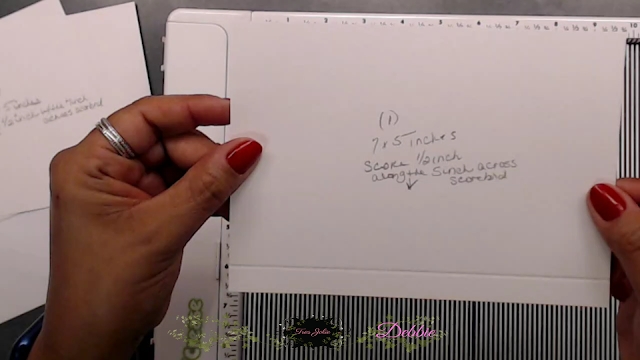
Cut 4 photo mats at 7 1/2 x 5 and score on along the 7 1/2 inch side downward for all 4 pieces.

Adhere the photo mat that is 7 x 5 to the bottom of the envelope, placing adhesive to the 1/2 inch flap

Next adhere your flaps that are 7 1/2 x 5 with the 1/2 inch score line. Adhere one to the right and one to the left side placing adhesive to the 1/2 inch flap. (see photo below)

You should have your mat like this once you attach the right side flap/photo mat.

Now your envelope should look like this.

Next we are adding the other flaps to the inside. Place one of the extra flaps to the inside with the 1/2 inch flap towards the lifted flap, as shown below.

Place your adhesive down and glue together. Now you will have a fold out for your photos. Do this for the other side as well.

Next place your magnets on, place one on the top inside of the envelope flap and one on the bottom make sure they match up.

Now you can add your pattern paper to all your photo mats.

For the inside I punched a half circle on the pattern paper so I could place more photo mats inside the envelope pocket.

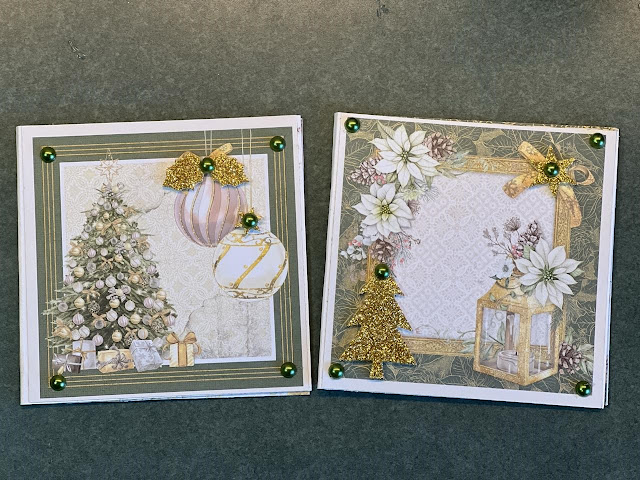
Here is one of the pages I decorated using the beautiful sparkling deer.

Here are a couple of photo mats I did as an example to place inside the envelope pocket.

Here a couple of booklets I created using the beautiful 4x4 cut a-parts from the paper collection.
Cut a 8 1/2 x 11 inch paper at 4 x 8 3/8 inches, Score at 4 1/8 and 4 1/4. So easy to make.
Since I was running low on paper I did use scraps to decorate the inside and it will give a top and bottom border to the photos.

Here is a photo of one of the pages I decorated.

Here is another one with the beautiful sparkling dove.

Here is the finished book and small booklets.

Thanks for joining me today. I hope you enjoyed this little Christmas Envelope Booklet.
This paper from Ciao Bella is just beautiful and I enjoyed working with it.
To get this beautiful collection head to Tres Jolie, just click on the link here.
