Cards! - January 2023 Cards & Mixed Media Kits!
Hey y’all! This week I have some super easy cards for you – even if they are mixed media cards - since the Lava Paste is made to be heat dried!
I’m going to make this a short overview post, mostly because there aren’t all that many steps involved! If you want to see the full process, make sure you check out the video!

...
...
Originally, I had only planned on making the two slimline cards, but I decided to add in the little notecard when I thought of something I wanted to try while working on the other two!
 |
 |
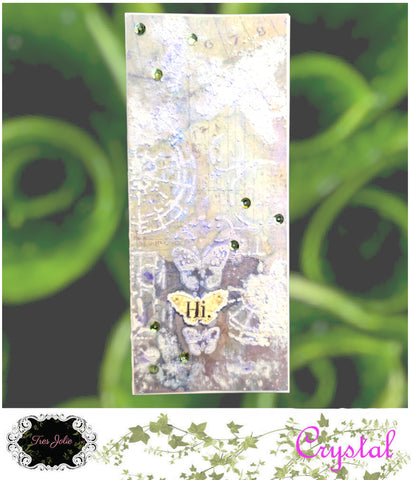
The backgrounds were super easy, for the butterfly card, I coated the cardstock with some clear gesso before stenciling on my lava paste, and for the dragonfly card, I added the lava paste directly to the cardstock, then after I had dried the lava paste, I sprayed a coat of Workable Fixatif over everything. This way I could test a couple of different techniques with the lava paste and the Pixie Dusts in this month’s Mixed Media Kit.
Once the backgrounds were dried, I sprinkled on some of the Pixie Dusts, watered them down some, and then did some light drying just too keep the colors where I had decided I liked them and to keep the paper from getting too wet, then I just set them off to finish air drying. (There may have been some coatings on them, but gesso and Fixatif aren’t made to just sit with puddles on them!!)
 |
 |
It was during all of this that I thought of a third technique I wanted to try – adding the Pixie Dust to the wet Lava Paste and adding just a light mist of water to activate it! When I heated the Lava Paste, it created some lovely veining with the colors as the paste expanded and poofed up! I also wanted to see how the dust would work directly on the background without any type of gesso/sealer, so I added it on top of my [now dried] Lava Paste, used a soft brush to spread it around, misted it with some water and then just let it dry.
 |
 |
With my background done, it was just a matter of adding the bits and pieces to the card fronts. I added a layer of the Lava Paste to the backs of the cutout pieces and the sentiments, because I figured it would be a nice way to give those pieces some lift and a little support to the cardstock! I also added some of the paste to the edges of all of the pieces, then it was just a matter of sticking all the embellishments down and adding a few sequins from my stash.
Thank you for joining me today on the blog, I hope these cards gave you some ideas of what you can make using the January Cards, Tags, & More Kit and Mixed Media Kit!
Stay Crafty, Friends
...
Did you get a kit? Share what you made in our Facebook Group!
Thank you for joining us here at Tres Jolie Kits!
Tres Jolie can also be found at:
 |
 |
In addition to this month’s Cards, Tags, & More Kit and Mixed Media Kit (from previous Tres Jolie Kits), I used:
TCW “Mini Screen Print” Stencil , TCW “Mini Specimens” Stencil , Finnabair “Passiflora” Stencil , Simon Says Stamp “Extra Talkative Set” , StazOn “Royal Purple” , Marco’s Papers Cougar Opaque Cover “Natural” , EK Tools Scoreboard , Finnabair Clear Gesso, Krylon Workable Fixatif, Ranger Glossy Accents , Fabri-Tac , sequins , spray bottle