3D Shadow Boxes
Hello Everyone!
Dana here! I'm excited to share with you another Home Decor project featuring this month's January Tres Jolie’s Scrapbook kit! This kit has some gorgeous papers from 3 Quarter Designs "Christmas Wonderland" collection!

This kit is jam-packed with beautiful papers, chipboards and beautiful flowers from Prima Marketing and Little Birdie! What I really love about this kit is they added 2 A-4 Diecut sheets of images you can punch out and use on so many different projects! And of course the fun fussycut elements sheets to use.
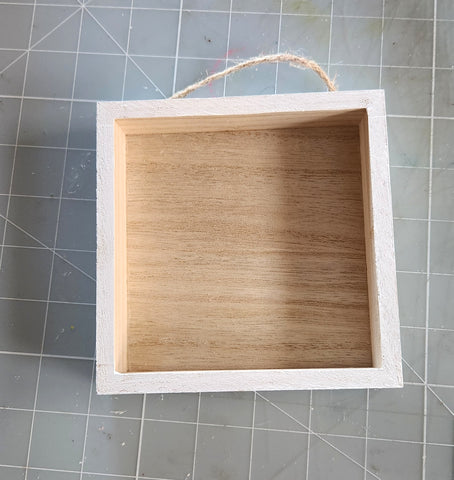
Today's project we'll be creating 3 Shadow Boxes (which I purchased at my local craft store) These papers have a nice wintery feel and so you could display these shadow boxes, not only during the holidays but throughout the winter season.

To begin this project, I took a paintbrush and Folkart Matte Wicker white acrylic paint (in my stash) and applied to the both the inside, outside panels on each box, including along the front edge. I also applied some paintalong the inside corners of my box.

I will be inking all of my papers including my fussycut images with Tim Holtz Distress Ink Gathered Twigs (from my stash)
I chose a 12x12 paper from the kit, and cut 3 squares measuring 4 &1/4 inches. Adhere to the inside back panel of each box.

Next I chose some images from the elements sheets and fussy cut out a variety of images including some punched out pieces from the A-4 Diecut sheets. I also fussy cut 3 different storefront images from the Storefronts elements sheet. I applied some foam dots (from my stash) onto the back of the storefront pieces. Then I adhered to the bottom inside of my box.

Repeat for the other two boxes. Next I chose where I wanted to place my embellishments on my box.
Box 1: I fussycut the lamppost from the "clock" elements sheet, then adhered on the left side frame on my box. I added a elements sentiment above my storefront piece. I had some Gold Dazzle sticker stars in my stash, so I applied some over the star images on the storefront window. Then I applied some Stickles Diamond glitter around the windows, door and top of my storefront. Then I added some fake snow on the top of the storefront image and along the bottom inside ledge of my box. Lastly I glued the cute patterned bow (from the Diecut sheet) over my jute cord hanger at the top. I also twisted some irredisicent and blue chenille stems together and glued them along the top and bottom. Here's acouple closeups!

Box 2: I fussy cut a sentiment and using a bone folder, I curled both ends slightly and adhered above the storefront image. I also fussy cut the plaid ribbon image and blue button, both from the elements sheets.

I glued the ribbon onto the right side of my frame. The glitter Snowflake Diecut (from my stash) I adhered over the ribbon, then applied foam dots to the back of the button image and adhered on top of the Snowflake Shape. I added a cute Snowflake button on the top! Then applied some Stickles Diamond glitter and fake snow as we did on the previous box, in addition to the chenille stems! I took one of the pretty blue flowers and glued at the top! Here's acouple closeups!


Box 3: I fussy cut 3 bubbles and HoHo Ho sentiment from the elements sheets. I punched out another bow from the A-4 sheet. I adhered the sentiment at the top. I covered each bubble with some epoxy dots from my stash, then adhered scattered above my storefront image. I applied some Stickles Diamond glitter and fake snow as before. Then I applied some Liquid pearls in Rouge (from my stash) to the wreath to resemble berries. I glued my chenille stems in place and glued the bow at the top! Here's a closeup!
 Now your Shadow Boxes are ready to hang and enjoy for years to come!
I hope you found this project inspiring and fun. I'd love to see yours if you decide to create one! Thanks for stopping by the Tres Jolie blog! Be sure to grab your kit today before they sell out! Check back often so you don't miss what Jeanne, Crystal and Lisa our guest designer, have in store for you!
I'll be back next week with another project to share! Until then, Happy Crafting!
Dana